How to Load NFT Data into an IPFS Repository
An NFT collection is a grouping of one or more NFTs, with or without images. Before you can create a collection, you must store the data (image and metadata) of your NFT collection in an InterPlanetary File System (IPFS). However, the main reason for storing your NFT data in an IPFS is that you don’t lose it. Once your data is lost, your NFT becomes worthless.
So, if you create, sell, or buy an NFT, it is prudent that you make a copy of the NFT’s off-chain data in the cloud of a pinning service. By doing so, you can ensure that the off-chain data is accessible through a specific Base URI address in an IPFS hosting service. This allows you to upload the same data to two different nodes in a network or repeatedly upload/download the off-chain data and still maintain consistency.
In this tutorial, we are using Pinata as the IPFS pinning service for storing your NFT data.
Prerequisites
Before you can begin using Pinata, make sure that you have the following:
- Pinata Account
Note: We use Pinata as our pinning service to IPFS. If you are using a different pinning service, it is highly recommended that you save your asset locally as a backup.
- NFT Assets
-
- Associated image(s) and Metadata
- Text Editor
- You can use any text editor
Preparing your NFT Assets
Perform the following steps in preparing your NFT assets for IPFS upload:
1. Collect all of your NFT assets in one folder in your localhost computer:

2. Convert each asset into ‘Document’ file type by:
a. Right click each file, click ‘Get Info’.
b. Under Name & Extension, delete the file extension (e.g., .png, .jpeg, .mp3)

c. The pop-up, Are you sure you want to remove the extension? appears. Click Remove.
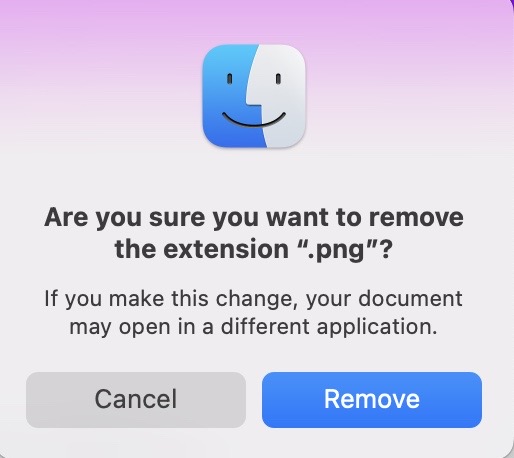
d. After deleting the file extension, the file type is now Document. Repeat these steps for all other assets.

Uploading your NFT Asset Folder to the IPFS
3. Upload your NFT asset folder to Pinata to get the folder’s content id (CID) number.

4. Create a metadata file for each asset with associated CID.
a. Each asset you’ve uploaded needs to have an associated file with metadata attributes (formatted in JSON). Download a sample metadata file here.
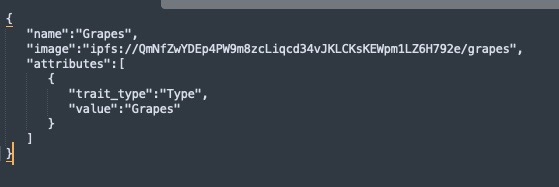
b. Check that the image URL is ipfs://{CID of assets}/{name of asset}
c. Format the metadata file with the associated token ID (e.g. 1, 2, 3) and be sure to remove the .json file extension, so it becomes a document file type, as listed below.

5. Upload folder of metadata files to Pinata. Afterwards, copy the CID number by using the copy icon.

Adding your BASE URI to the Token Generator
6. Get Base URI for Token Generator. In the Token Generator, paste the CID number into the Base URI field. Make sure you format the Base URI as:
ipfs://{metadata CID}/
Simply follow the remaining steps on the TokenMint Token Generator to create your own NFTs!
About TokenMint
TokenMint is an easy-to-use platform for anyone to launch a token using custom tokenomics without having to know a single line of code. It streamlines and simplifies the tokenization process, making creating a fungible token and non-fungible token (NFT) easy and quick.
TokenMint’s NFT creation and minting feature is currently on testnet and is free to everyone to use. If you require additional TestZEN for testing, be sure to check out our tutorial, How To Get TestZEN.
For the latest updates about TokenMint and NFT features, please follow us on Twitter

